I take my Raindrop Animation from last time and converted it into a screen saver, complete with a Settings dialog, to allow tweaking the various parameters.
Note: Full source code available on Codeplex, at: http://wavesimscrsaver.codeplex.com/
Last time, I created a WPF application that displayed an animated simulation of raindrops falling on water. It was a little work, but not a huge effort, to convert that application into a Windows screen saver.
A screen saver is mainly just a regular .exe file with a .scr extension that has been copied into your C:\Windows\system32 directory. In the simplest implementation, your application will just run when the screen saver kicks in. But a fully functional screen saver in Windows will also support two additional features—running in the little preview window in the Screen Saver dialog and providing a customization GUI that is launched from the Settings button in the Screen Saver dialog. You’ll also want to tweak the normal runtime behavior so that your application runs maximized, without window borders, and responds to mouse and/or keyboard events to shut down gracefully.
Our existing Raindrops WPF application runs in a WPF window. We can easily tweak its behavior to run maximized and without a window border. But we also need to interpret command line parameters so that we can decide which of the three following modes to run in:
- Normal (run screen saver maximized)
- Preview (run screen saver that is hosted in the little preview window)
- Settings (show dialog allowing user to tweak settings)
The first thing that we need to do is to change the main Application object in our WPF application and tell it not to start up a window, but to execute some code. We remove the StartupUri property (was set to “Window1.xaml”) and replace it with a Startup property that points to an Application_Startup method.
Here is the modified App.xaml code:
<Application x:Class="WaveSim.App"
    xmlns="http://schemas.microsoft.com/winfx/2006/xaml/presentation"
    xmlns:x="http://schemas.microsoft.com/winfx/2006/xaml"
    Startup="Application_Startup">
    <Application.Resources>

    </Application.Resources>
</Application>
The bulk of our changes will be in the new Application_Startup method. It’s here that we parse the command line and figure out what mode we should run under. The Screen Saver mechanism and dialog uses the following API to tell a screen saver how to run:
- /p handle Run in preview mode, hosting inside preview window whose handle is passed in
- /s Run in normal screen saver mode (full screen)
- /c Run in settings (configuration) mode, showing GUI to change settings
Here are the entire contents of App.xaml.cs, with the command line parsing logic:
using System;
using System.Collections.Generic;
using System.Configuration;
using System.Data;
using System.Drawing;
using System.Linq;
using System.Windows;
using System.Windows.Interop;
using System.Runtime.InteropServices;
using System.Windows.Media;

namespace WaveSim
{
    /// <summary>
    /// Interaction logic for App.xaml
    /// </summary>
    public partial class App : Application
    {
        // Used to host WPF content in preview mode, attach HwndSource to parent Win32 window.
        private HwndSource winWPFContent;
        private Window1 winSaver;

        private void Application_Startup(object sender, StartupEventArgs e)
        {
            // Preview mode--display in little window in Screen Saver dialog
            // (Not invoked with Preview button, which runs Screen Saver in
            // normal /s mode).
            if (e.Args[0].ToLower().StartsWith("/p"))
            {
                winSaver = new Window1();

                Int32 previewHandle = Convert.ToInt32(e.Args[1]);
                //WindowInteropHelper interopWin1 = new WindowInteropHelper(win);
                //interopWin1.Owner = new IntPtr(previewHandle);

                IntPtr pPreviewHnd = new IntPtr(previewHandle);

                RECT lpRect = new RECT();
                bool bGetRect = Win32API.GetClientRect(pPreviewHnd, ref lpRect);

                HwndSourceParameters sourceParams = new HwndSourceParameters("sourceParams");

                sourceParams.PositionX = 0;
                sourceParams.PositionY = 0;
                sourceParams.Height = lpRect.Bottom - lpRect.Top;
                sourceParams.Width = lpRect.Right - lpRect.Left;
                sourceParams.ParentWindow = pPreviewHnd;
                sourceParams.WindowStyle = (int)(WindowStyles.WS_VISIBLE | WindowStyles.WS_CHILD | WindowStyles.WS_CLIPCHILDREN);

                winWPFContent = new HwndSource(sourceParams);
                winWPFContent.Disposed += new EventHandler(winWPFContent_Disposed);
                winWPFContent.RootVisual = winSaver.grid1;
            }

            // Normal screensaver mode.  Either screen saver kicked in normally,
            // or was launched from Preview button
            else if (e.Args[0].ToLower().StartsWith("/s"))
            {
                Window1 win = new Window1();
                win.WindowState = WindowState.Maximized;
                win.Show();
            }

            // Config mode, launched from Settings button in screen saver dialog
            else if (e.Args[0].ToLower().StartsWith("/c"))
            {
                SettingsWindow win = new SettingsWindow();
                win.Show();
            }

            // If not running in one of the sanctioned modes, shut down the app
            // immediately (because we don't have a GUI).
            else
            {
                Application.Current.Shutdown();
            }
        }

        /// <summary>
        /// Event that triggers when parent window is disposed--used when doing
        /// screen saver preview, so that we know when to exit.  If we didn't
        /// do this, Task Manager would get a new .scr instance every time
        /// we opened Screen Saver dialog or switched dropdown to this saver.
        /// </summary>
        ///
<param name="sender"></param>
        ///
<param name="e"></param>
        void winWPFContent_Disposed(object sender, EventArgs e)
        {
            winSaver.Close();
//            Application.Current.Shutdown();
        }
    }
}
The most complicated thing about this code is what we do in preview mode. We need to basically take our WPF window and host it inside an existing Win32 window—the little preview window on the Screen Saver dialog. To start with, all we have is the handle of this window. The trick is to create a new HwndSource object, specifying the desired size and who we want for a parent window. Then we attach our WPF window by changing the HwndSource.RootVisual property. We also hook up an event handler so that we know when the window gets disposed. When the parent window goes away, we need to make sure to shut our application down (or it will continue to run).
Running in normal screen saver mode is the most straightforward of the three options. We simply instantiate our Window1 window and show it.
For settings/configuration mode, we show a new SettingsWindow window that we’ve created. This window will display some sliders to let the user change various settings and it will also persist the new settings to an .xml file.
The Raindrop settings are encapsulated in the new RaindropSettings class. This class just contains public (serializable) properties for the various things we want to tweak, and it includes Save and Load methods that serialize the properties to an .xml file and read them back in.
It’s important that we serialize these properties in an .xml file because the screen saver architecture doesn’t expect to display a settings dialog while the screen saver is running. Instead, it expects to run the application once to allow the user to change settings and then run again to show the screen saver.
Here is the full code for the RaindropSettings class. Note that we use auto-implemented properties so that we don’t have to write prop getter/setter code:
using System;
using System.Collections.Generic;
using System.IO;
using System.Linq;
using System.Text;
using System.Xml.Serialization;

namespace WaveSim
{
    /// <summary>
    /// Persist raindrop screen saver settings in memory and provide support
    /// for loading from file and persisting to file.
    /// </summary>
    public class RaindropSettings
    {
        public const string SettingsFile = "Raindrops.xml";

        public double RaindropPeriodInMS { get; set; }
        public double SplashAmplitude { get; set; }
        public int DropSize { get; set; }
        public double Damping { get; set; }

        /// <summary>
        /// Instantiate the class, loading settings from a specified file.
        /// If the file doesn't exist, use default values.
        /// </summary>
        ///
<param name="sSettingsFilename"></param>
        public RaindropSettings()
        {
            SetDefaults();      // Clean object, start w/defaults
        }

        /// <summary>
        /// Set all values to their defaults
        /// </summary>
        public void SetDefaults()
        {
            RaindropPeriodInMS = 35.0;
            SplashAmplitude = -3.0;
            DropSize = 1;
            Damping = 0.96;
        }

        /// <summary>
        /// Save current settings to external file
        /// </summary>
        ///
<param name="sSettingsFilename"></param>
        public void Save(string sSettingsFilename)
        {
            try
            {
                XmlSerializer serial = new XmlSerializer(typeof(RaindropSettings));

                FileStream fs = new FileStream(sSettingsFilename, FileMode.Create);
                TextWriter writer = new StreamWriter(fs, new UTF8Encoding());
                serial.Serialize(writer, this);
                writer.Close();
            }
            catch { }
        }

        /// <summary>
        /// Attempt to load settings from external file.  If the file doesn't
        /// exist, or if there is a problem, no settings are changed.
        /// </summary>
        ///
<param name="sSettingsFilename"></param>
        public static RaindropSettings Load(string sSettingsFilename)
        {
            RaindropSettings settings = null;

            try
            {
                XmlSerializer serial = new XmlSerializer(typeof(RaindropSettings));
                FileStream fs = new FileStream(sSettingsFilename, FileMode.OpenOrCreate);
                TextReader reader = new StreamReader(fs);
                settings = (RaindropSettings)serial.Deserialize(reader);
            }
            catch {
                // If we can't load, just create a new object, which gets default values
                settings = new RaindropSettings();
            }

            return settings;
        }
    }
}
Here is the .xaml for our SettingsWindow class. The window will contain four sliders, one for each setting. It also includes a button that resets everything back to the default values. When the user clicks the OK button, all settings are persisted to the RaindropSettings.xml file. (There is no cancel function).
<Window x:Class="WaveSim.SettingsWindow"
    xmlns="http://schemas.microsoft.com/winfx/2006/xaml/presentation"
    xmlns:x="http://schemas.microsoft.com/winfx/2006/xaml"
    Title="Raindrop Screensaver Settings" Height="300" Width="300">
    <Grid>
        <Button Height="23" Margin="0,0,48,17" Name="btnClose" VerticalAlignment="Bottom" Click="btnClose_Click" HorizontalAlignment="Right" Width="76">OK</Button>
        <Slider Height="21" Margin="0,27,10,0" Name="slidNumDrops" VerticalAlignment="Top" Minimum="1" Maximum="1000" AutoToolTipPlacement="BottomRight" HorizontalAlignment="Right" Width="164" ValueChanged="slidNumDrops_ValueChanged" />
        <Label Height="28" Margin="24,25,0,0" Name="label1" VerticalAlignment="Top" HorizontalAlignment="Left" Width="70">Num Drops</Label>
        <Button Height="23" HorizontalAlignment="Left" Margin="43,0,0,17" Name="btnDefaults" VerticalAlignment="Bottom" Width="76" Click="btnDefaults_Click">Defaults</Button>
        <Label Height="28" HorizontalAlignment="Left" Margin="6,66,0,0" Name="label2" VerticalAlignment="Top" Width="88">Drop Strength</Label>
        <Slider AutoToolTipPlacement="BottomRight" Height="21" Margin="104,70,10,0" Maximum="15" Minimum="0" Name="slidDropStrength" VerticalAlignment="Top" ValueChanged="slidDropStrength_ValueChanged" />
        <Label HorizontalAlignment="Left" Margin="29,111,0,123" Name="label3" Width="61">Drop Size</Label>
        <Slider AutoToolTipPlacement="BottomRight" Margin="104,114,10,127" Maximum="6" Minimum="1" Name="slidDropSize" ValueChanged="slidDropSize_ValueChanged" />
        <Label Height="28" HorizontalAlignment="Left" Margin="30,0,0,79" Name="label4" VerticalAlignment="Bottom" Width="61">Damping</Label>
        <Slider AutoToolTipPlacement="BottomRight" Height="21" Margin="104,0,10,83" Maximum="100" Minimum="50" Name="slidDamping" VerticalAlignment="Bottom" ValueChanged="slidDamping_ValueChanged" SmallChange="0.01" LargeChange="0.1" />
    </Grid>
</Window>
And here is the full code for SettingsWindow.xaml.cs. When we load the window, we read in settings from the .xml file and change the value of the sliders. When the user clicks OK, we just save out the current settings to RaindropSettings.xml.
using System;
using System.Collections.Generic;
using System.Linq;
using System.Text;
using System.Windows;
using System.Windows.Controls;
using System.Windows.Data;
using System.Windows.Documents;
using System.Windows.Input;
using System.Windows.Media;
using System.Windows.Media.Imaging;
using System.Windows.Shapes;

namespace WaveSim
{
    /// <summary>
    /// Interaction logic for SettingsWindow.xaml
    /// </summary>
    public partial class SettingsWindow : Window
    {
        private RaindropSettings settings;

        public SettingsWindow()
        {
            InitializeComponent();

            // Load settings from file (or just set to default values
            // if file not found)
            settings = RaindropSettings.Load(RaindropSettings.SettingsFile);

            SetSliders();
        }

        private void btnClose_Click(object sender, RoutedEventArgs e)
        {
            settings.Save(RaindropSettings.SettingsFile);
            this.Close();
        }

        /// <summary>
        /// Set all sliders to their default values
        /// </summary>
        ///
<param name="sender"></param>
        ///
<param name="e"></param>
        private void btnDefaults_Click(object sender, RoutedEventArgs e)
        {
            settings.SetDefaults();
            SetSliders();
        }

        private void SetSliders()
        {
            slidNumDrops.Value = 1.0 / (settings.RaindropPeriodInMS / 1000.0);
            slidDropStrength.Value = -1.0 * settings.SplashAmplitude;
            slidDropSize.Value = settings.DropSize;
            slidDamping.Value = settings.Damping * 100;
        }

        private void slidDropStrength_ValueChanged(object sender, RoutedPropertyChangedEventArgs<double> e)
        {
            if (settings != null)
            {
                // Slider runs [0,30], so our amplitude runs [-30,0].
                // Negative amplitude is desirable because we see little towers of
                // water as each drop bloops in.
                settings.SplashAmplitude = -1.0 * slidDropStrength.Value;
            }
        }

        private void slidNumDrops_ValueChanged(object sender, RoutedPropertyChangedEventArgs<double> e)
        {
            if (settings != null)
            {
                // Slider runs from [1,1000], with 1000 representing more drops (1 every ms) and
                // 1 representing fewer (1 ever 1000 ms).  This is to make slider seem natural
                // to user.  But we need to invert it, to get actual period (ms)
                settings.RaindropPeriodInMS = (1.0 / slidNumDrops.Value) * 1000.0;
            }
        }

        private void slidDropSize_ValueChanged(object sender, RoutedPropertyChangedEventArgs<double> e)
        {
            if (settings != null)
            {
                settings.DropSize = (int)slidDropSize.Value;
            }
        }

        private void slidDamping_ValueChanged(object sender, RoutedPropertyChangedEventArgs<double> e)
        {
            if (settings != null)
            {
                settings.Damping = slidDamping.Value / 100;
            }
        }
    }
}
The only remaining thing to be done is to change Window1 to get rid of our earlier sliders and to read in the settings from the .xml file.
Here is the modified Window1.xaml code:
<Window x:Class="WaveSim.Window1"
    xmlns="http://schemas.microsoft.com/winfx/2006/xaml/presentation"
    xmlns:x="http://schemas.microsoft.com/winfx/2006/xaml"
    Title="Window1"
    MouseWheel="Window_MouseWheel" ShowInTaskbar="False" ResizeMode="NoResize" WindowStyle="None"
        MouseDown="Window_MouseDown" KeyDown="Window_KeyDown" Background="Black">
    <Grid Name="grid1">
        <Viewport3D Name="viewport3D1">
            <Viewport3D.Camera>
                <PerspectiveCamera x:Name="camMain" Position="255 38.5 255" LookDirection="-130 -40 -130" FarPlaneDistance="450" UpDirection="0,1,0" NearPlaneDistance="1" FieldOfView="70">

                </PerspectiveCamera>
            </Viewport3D.Camera>
            <ModelVisual3D x:Name="vis3DLighting">
                <ModelVisual3D.Content>
                    <DirectionalLight x:Name="dirLightMain" Direction="2, -2, 0"/>
                </ModelVisual3D.Content>
            </ModelVisual3D>
            <ModelVisual3D>
                <ModelVisual3D.Content>
                    <DirectionalLight Direction="0, -2, 2"/>
                </ModelVisual3D.Content>
            </ModelVisual3D>
            <ModelVisual3D>
                <ModelVisual3D.Content>
                    <GeometryModel3D x:Name="gmodMain">
                        <GeometryModel3D.Geometry>
                            <MeshGeometry3D x:Name="meshMain" >
                            </MeshGeometry3D>
                        </GeometryModel3D.Geometry>
                        <GeometryModel3D.Material>
                            <MaterialGroup>
                                <DiffuseMaterial x:Name="matDiffuseMain">
                                    <DiffuseMaterial.Brush>
                                        <SolidColorBrush Color="DarkBlue"/>
                                    </DiffuseMaterial.Brush>
                                </DiffuseMaterial>
                                <SpecularMaterial SpecularPower="24">
                                    <SpecularMaterial.Brush>
                                        <SolidColorBrush Color="LightBlue"/>
                                    </SpecularMaterial.Brush>
                                </SpecularMaterial>
                            </MaterialGroup>
                        </GeometryModel3D.Material>
                    </GeometryModel3D>
                </ModelVisual3D.Content>
            </ModelVisual3D>
        </Viewport3D>
    </Grid>
</Window>
And here is the updated Window1.xaml.cs. Note that we also add event handlers to shut down the application when a mouse or keyboard button is pressed.
using System;
using System.Collections.Generic;
using System.Diagnostics;
using System.Linq;
using System.Text;
using System.Windows;
using System.Windows.Controls;
using System.Windows.Data;
using System.Windows.Documents;
using System.Windows.Input;
using System.Windows.Media;
using System.Windows.Media.Media3D;
using System.Windows.Media.Imaging;
using System.Windows.Navigation;
using System.Windows.Shapes;
using System.Windows.Threading;
namespace WaveSim
{
///
///
public partial class Window1 : Window
{
private Vector3D zoomDelta;
private WaveGrid _grid;
private bool _rendering;
private double _lastTimeRendered;
private Random _rnd = new Random(1234);
// Raindrop parameters, from .xml settings file
private RaindropSettings _settings;
private double _splashDelta = 1.0; // Actual splash height is Ampl +/- Delta (random)
private double _waveHeight = 15.0;
// Values to try:
// GridSize=20, RenderPeriod=125
// GridSize=50, RenderPeriod=50
private const int GridSize = 250; //50;
private const double RenderPeriodInMS = 60; //50;
public Window1()
{
InitializeComponent();
// Read in settings from .xml file
_settings = RaindropSettings.Load(RaindropSettings.SettingsFile);
// Set up the grid
_grid = new WaveGrid(GridSize);
_grid.Damping = _settings.Damping;
meshMain.Positions = _grid.Points;
meshMain.TriangleIndices = _grid.TriangleIndices;
// On each WheelMouse change, we zoom in/out a particular % of the original distance
const double ZoomPctEachWheelChange = 0.02;
zoomDelta = Vector3D.Multiply(ZoomPctEachWheelChange, camMain.LookDirection);
StartStopRendering();
}
private void Window_MouseWheel(object sender, MouseWheelEventArgs e)
{
if (e.Delta > 0)
// Zoom in
camMain.Position = Point3D.Add(camMain.Position, zoomDelta);
else
// Zoom out
camMain.Position = Point3D.Subtract(camMain.Position, zoomDelta);
}
// Start/stop animation
private void StartStopRendering()
{
if (!_rendering)
{
//_grid = new WaveGrid(GridSize); // New grid allows buffer reset
_grid.FlattenGrid();
meshMain.Positions = _grid.Points;
_lastTimeRendered = 0.0;
CompositionTarget.Rendering += new EventHandler(CompositionTarget_Rendering);
_rendering = true;
}
else
{
CompositionTarget.Rendering -= new EventHandler(CompositionTarget_Rendering);
_rendering = false;
}
}
void CompositionTarget_Rendering(object sender, EventArgs e)
{
RenderingEventArgs rargs = (RenderingEventArgs)e;
if ((rargs.RenderingTime.TotalMilliseconds – _lastTimeRendered) > RenderPeriodInMS)
{
// Unhook Positions collection from our mesh, for performance
// (see http://blogs.msdn.com/timothyc/archive/2006/08/31/734308.aspx)
meshMain.Positions = null;
// Do the next iteration on the water grid, propagating waves
double NumDropsThisTime = RenderPeriodInMS / _settings.RaindropPeriodInMS;
// Result at this point for number of drops is something like
// 2.25. We’ll induce integer portion (e.g. 2 drops), then
// 25% chance for 3rd drop.
int NumDrops = (int)NumDropsThisTime; // trunc
for (int i = 0; i < NumDrops; i++)
_grid.SetRandomPeak(_settings.SplashAmplitude, _splashDelta, _settings.DropSize);
if ((NumDropsThisTime - NumDrops) > 0)
{
double DropChance = NumDropsThisTime – NumDrops;
if (_rnd.NextDouble() <= DropChance)
_grid.SetRandomPeak(_settings.SplashAmplitude, _splashDelta, _settings.DropSize);
}
_grid.ProcessWater();
// Then update our mesh to use new Z values
meshMain.Positions = _grid.Points;
_lastTimeRendered = rargs.RenderingTime.TotalMilliseconds;
}
}
private void Window_MouseDown(object sender, MouseButtonEventArgs e)
{
Application.Current.Shutdown();
}
private void Window_KeyDown(object sender, KeyEventArgs e)
{
Application.Current.Shutdown();
}
}
}
[/sourcecode]
Here is a .zip file containing the entire Raindrops Screen Saver project. After you build it, you’ll need to:
- Rename WaveSimScrSaver.exe to WaveSimScrSaver.scr
- Copy WaveSimScrSaver.scr to C:\Windows\system32
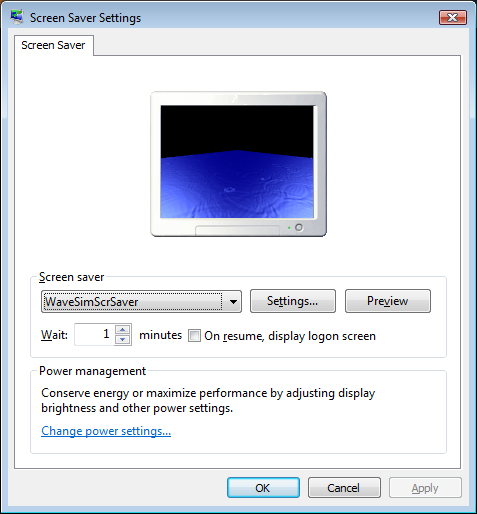
Here’s a screen shot of the screen saver running in Preview mode. This is very satisfying, since getting this to work properly was the hardest part of the project.
Next Steps
There are a few obvious “next steps” to take in this project, including:
- Stop screen saver on mouse move (stop on large movement, but not small movement)
- Run screen saver on multiple monitors/screens
- Allow user to set the background image
- Allow user to set an image to get mapped onto the surface of the water
Sources
Here are some of the sources that I used in learning how to create and run a screen saver in WPF:

Hi,
Great tutorial! Do you have any plans for completing the “Next Steps”?
There is a spectacular screensaver for osx LotsaWater (http://wakaba.c3.cx/s/lotsablankers/lotsawater.html) and unfortinately no Windows version (ironicly it is based on a very old win32/opengl apllication).
It would be nice to improve your app. Sadly, WPF is not in my arsenal of development platforms :(
I got multiple screens to work by substituting in the following code in ‘Application_Startup’:
else if (e.Args[0].ToLower().StartsWith(“/s”))
{
// BEGIN: Code changes
foreach(System.Windows.Forms.Screen scr in System.Windows.Forms.Screen.AllScreens)
{
Rectangle scrRect = scr.Bounds;
Window1 win = new Window1();
win.Top = scrRect.Top;
win.Left = scrRect.Left;
win.Height = scrRect.Height;
win.Width = scrRect.Width;
win.Show();
}
// END: Code changes
}
I am somewhat new to WPF, so I don’t know if this is the proper way to do this. But it seems to work…
Excellent, thanks Paul!
Pingback: Picture Pile Screensaver v1.0.2.6 - GD Soft
Pingback: Extendable screen saver with Prism – I.Reznykov's blog
Pingback: Extendable screen saver with Prism – RS Team