I thought I’d do my part to flood the web with screenshots from the M3 preview of Windows 7 that was distributed at last week’s Professional Development Conference in LA.
The obvious place to start in Win 7 is with the installation process. I’ll put up more posts later with screenshots of various bits and pieces in Windows 7. But this first post will just contain: every damn Windows 7 installation screen.
Ok, admittedly, looking through install screens is about as exciting as watching bacon fat congeal. But really—there are people out there who will eat this stuff up. So it’s for them that I’ve suffered an endless series of screen captures. Enjoy.
The Environment
I installed my copy of Windows 7 to a VMWare virtual machine. The only “gotcha” was that VMWare creates a SCSCI virtual hard drive by default—which Windows 7 failed to recognize. Simple fix—just delete the default hard drive and create an IDE drive in VMWare.
The Screens
Ok, here we go.
You just get shivers as you start to install a new Microsoft OS for the first time, don’t you?
Then we switch from a DOS-looking progress bar to a cute Windows-looking progress bar:
Next we get the first Windows 7 install screen. This is the spot to insert the angelic music.
After picking an install language, you get to the main install kick-off window:
I once met a guy who actually read these EULAs. Can you believe it?
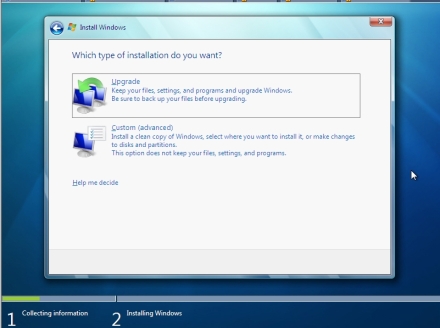
This next dialog is just as confusing in Windows 7 as it was in Vista.
In my first try, I went with the Upgrade option, which only got me this next confusing empty dialog. Nice.
Restarting everything and instead choosing Custom gets us where we want to go:
If you click on the link that reads “Drive options (advanced)”, you’ll see some options for managing hard disk partitions:
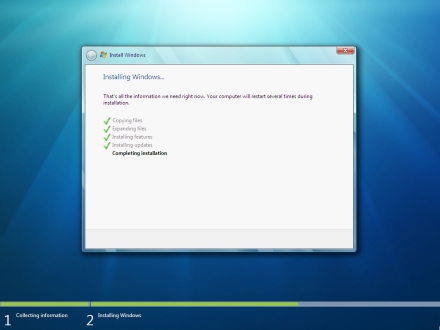
Finally, the actual installation begins.
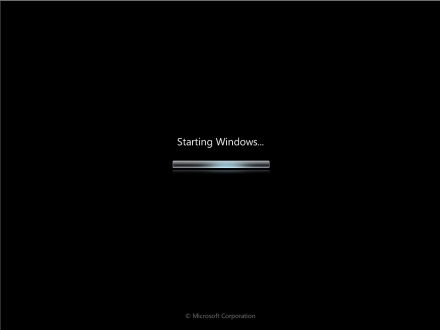
At some point, near the end of the installation, Windows boots for the first time. It lives!
This was an interesting detail during the boot process:
All of the services apparently start firing up, as the boot process continues. (Hallelujah)!
And for some reason, we’re allowed to go back and look at this status dialog one more time.
And then back to the main boot screen. (Are you starting to feel as if you were really there)?
Oh, this is a nice little touch. No screen flickers or anything, but nice to know that it’s “checking” my video performance. (Whatever that means).
Now Windows is more or less running and we start doing some of the final configuration stuff. First, we specify a default username. This will be the Administrator user account. Seeing a PC name of “PC” also makes me think of John Hodgman and the Mac switcher ads.
And I enter my password:
And (of course) the product activation key. Wouldn’t it be cool if every key had a barcode and I could use a barcode scanner at this point? (My key did not have a barcode).
I also get to set my time and time zone.
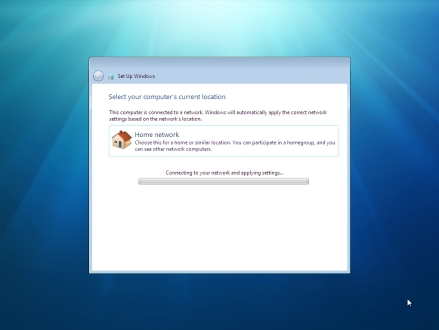
This is an interesting one. Right out of the gate, I’m asked to specify whether my network is public or not. Like Vista, this dictates some default security settings.
I picked Home network and Windows 7 did some remaining network configuration work.
Ok, here’s one of the first really new things to show up. A “homegroup” is basically a relabeled “workgroup”—something short of a domain. I’m wondering if I’d chosen Work location in the earlier screen, if I’d now be joining a domain.
Finally, we are “welcomed” to Windows 7.
We’re so close, I can taste it.
And voila! The Windows 7 installation is complete and we’re sitting at the desktop screen. Note that I don’t have that cool new taskbar in the build that was handed out at PDC. More on that next time—the new taskbar is actually in the build and Rafael Rivera has found a hack to unlock it.


Interesting how you can connect to the internet with your copy. My sound and network adapters no longer work in Windows 7. Bummer. 8^)
good but still needs the complete installation of features of the windows 7
Hello,
Not the network adaptors but the sound cards are generally problem. But does not affect the success of the installation. The drivers should be reinstalled.
cannot get my touchpad to work with 7600 build .
Thanks for this.. I have used your pictures in my college work. Hope you don’t mind!
Not at all–glad that you could make use of them!
Hi
Its really awesome.
Thanks
good work..this installation screen shot will help many people in installing win7…thank you
i have a problem in picture no. 5 …. it dosent show any hard drive ?? please help
This is quite useful for my work. And the effort you put in on these screenshots. Thanks for all the hard work.
Hey, thanks for these pictures. The screen of my notebook is broken and I need to install it without seeing it -.- (Connecting to an extra monitor is not available while installing)
Hopefully it will work :D
Hey !! These screenshots are actually very helpfull BUT these are only when anyone is trying to install Win 7 , HOWEVER , these are not the right screenshots if any end user is trying to UPGRADE from Win Vista to Win 7 OS …
followed your steps my good man, Expanding windows 26%. hehe.
hey sean… am a technician, wenever i install windows 7, i gothru ur site… thanks.. really thats useful..
Hi.. I bought a new HP laptop with windows 7 pre-installed on it. OF the 320 GB HD, 285gb is setup as C and remaining as recovery. How do i partition the 285 GB into 2 or 3 partitions. Can someone throw light on this pls..
This is helpful.
Thanks
Really….Goooooooood, Thanks
Pingback: Lessons in Troubleshooting: Focus and Systematic Coverage Are Key | IT Expert Voice
Hi,
I want to install windows in 32 – bit version. But, how to do it? Pl. help.
Milind, what problem are you experiencing? The 32-bit version of Windows 7 is a completely separate install than the 64-bit one. What media are you installing from? Did you purchase Windows 7 as a retail DVD or upgrade?
Hii,
Its clearly not mentioned that form where the CD is to be booted form after inserting it in the drive-( I am speaking about the boot sequence)from the time of inserting the Cd into the drive slot-
Please be more specific how to do a clean instillation.
Its really an amazing work done- keep it up
My Touch pad has stopped working with 7600 build . It works fine with Win7 RC or Win XP ..
Any Ideas ?
Did you install from a copy that you purchased a genuine license for? What is the error?
Hi Sean
Is it necessary to install Windows 7 on icore processors, can’t it be installed with AMD?
Riju, yes you can install Windows 7 on an AMD-based machine.
Pingback: Installing Windows 7 « t h e S h a o l i n . c o m
Hi,
I am ssuming the above screenshots shots are for the 64-bit version of Windows 7. Sean can you please confirm if it.
Also can you provide screenshots for the 32-bit version of Windows 7 or direct us to a good resource.
Thanks,
I am so so so thank you. It is very helpful for my assignment. Thanks alot.
hi. i also have got an assignment to work on operating systems installation. would you plz send me your slides so that i may be able to show impressive work
I think that perhaps you should do your own work. :O)
thanks i made my assignment with ease
please can i hve the wireless screen shot too for windows7?thanks
Wow, thanks so much for this, we teach kids to build PCS to give them the edge when applying for work. these screenshots are exactly what I needed
Thanks
Thanks Sean,
I use this to help my customers install the copy of Win7 on there system.
Hi Sean found your screenshots very useful I am finishing my first year foundation degree and have included your sceenshots in my assignment referenceing your excellent work many thanks from Big Eric
it would be good if we had a parallel installation option included in this screen shot so that we can even save the personal data on the computer
thank you so much and this screen shot installation has helped on many occassions and you rockkkkkk!!!!!!!!!!!!!!
thanks a lot for the needful help hope a great success ahead in your website
hi there.
Excellent tutorial, however I am wondering how you can capture screen shots during installation?
Are you capturing them via a phone or something?
Thanks in advance……
Thanks, good question. I ran the install in a virtual machine and then did screen captures on the host. (Normal method–Ctrl-PrtScrn).
Excellent, thanks for your prompt reply! I appreciate it. I’m quite savvy and perform builds etc regularly, but never knew how to do this.
Cheers mate!
Exellent:)
OK, how do I get the disk into the machine? I’m reinstalling on a laptop — had to replace the hard drive so it’s completely blank. The laptop has one of those disk drives that sucks the disk into the maching and I can’t get it to suck it in!
Sounds like you have some hardware problem with your CD/DVD drive–or there is already a disk in the drive.
Thanks for this :) I had to list all the details for W7 Install for a Lab in class, which I had forgot to jot down & this came in super handy.
Thanks a lot sean
Oh Sean, so so cool of you. Thanks.
Excellent work mr. sean can you tell me if i need complete screen shot how to take it with home or office
Great job, Sean. Very useful stuff.
tis very useful for me.
but i have one small doubt.
now when i am switchon my system
automatically display error message
“Enter your window key
this copy of window is not geniue”
what’s the problem
pls send reply
You need to activate Windows and enter the product key that you received when you purchased your copy.
thank you
Awesome. I really didn’t want to reinstall Windwows to memorize these screens for my 70-680 test. Thanks so much!
very good work…its very helpfull…..
Awesome :)
Hi,
Excellent documentation.
Sorry for asking a basic question but how did you get such nice screenshots even before Windows is being installed?
Thanks in advance.
Ah, I see already asked and answered in #34.
I have use Ur picture in my article .. hope you won’t mind..:) thank you
its nice but i have a problm i am use a without internet system and window get from a cd disc after the installation show on screen (window failed to start and get below three option enter chose,tab menu,esc cancel so then i am what to do plz help me
Thanks for this help